Every filmmaker learns the hard way that bad sound kills good visuals. You can shoot on a $10,000 camera, but if your audio sounds like a tin can in a hallway, the audience will bail before the first act. The truth is, great sound doesn’t require a massive budget — it requires strategy, awareness, and a few smart gear choices. Let’s break down how indie filmmakers can capture clean, cinematic audio without breaking the bank.
🎙️ Start with the Right Mic — Not the Most Expensive One
The biggest mistake new filmmakers make is assuming price equals quality. It doesn’t. What matters is
placement and purpose. A $200 shotgun mic properly boomed will outperform a $1,000 mic mounted on‑camera ten feet away.
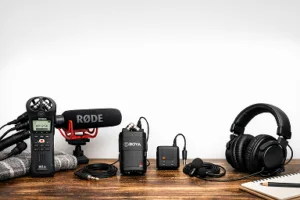
If you’re working lean, start with something like the
RØDE NTG‑2 or
Deity V‑Mic D3 Pro — both deliver crisp, directional sound and handle outdoor shoots well. Pair it with a
budget boom pole and a
shock mount, and you’ve already elevated your sound above most low‑budget sets. For interiors or dialogue‑heavy scenes, a
lav mic like the
RØDE Lavalier II or
BOYA BY‑M1 Pro can hide under clothing and keep voices clean.
🎧 Use a Recorder That Works for You
Don’t rely on your camera’s preamps — they’re noisy and weak. A dedicated recorder gives you control and clarity. The
Zoom H5 or
Tascam DR‑40X are indie staples: portable, reliable, and capable of recording multiple tracks. They let you monitor levels, adjust gain, and capture backup audio — all essential when you don’t have a full sound team.
If you’re really scraping by, even a
Zoom H1n can do wonders for ambient sound or backup dialogue. The trick is consistency — record clean, monitor constantly, and never assume “it’s fine.”
🧰 DIY Soundproofing and Acoustic Control
You don’t need a studio to control acoustics. Blankets, curtains, and foam mats are your best friends. Hang them around your set to absorb reflections. Throw a rug under your actors to kill floor echo. If you’re shooting in a kitchen or empty room, fill it with soft furniture — anything that breaks up hard surfaces helps.
For exteriors, invest in a
deadcat windscreen. It’s a small purchase that saves hours of post‑production cleanup. Wind noise is the silent killer of indie sound.
🎛️ Monitor Everything — Always
Even with cheap gear, monitoring makes the difference. Use
closed‑back headphones like the
Audio‑Technica ATH‑M40x or
Sony MDR‑7506 to catch issues before they ruin a take. Listen for hums, pops, and background chatter. If you can’t hear it on set, you’ll definitely hear it in post.
And don’t forget to record
room tone — thirty seconds of silence in every location. It’s the glue that makes your dialogue edits seamless later.
🎬 Post‑Production: The Hidden Budget Saver
Good sound isn’t just captured — it’s sculpted. Free or affordable software like
Audacity,
DaVinci Resolve Fairlight, or
Reaper can clean up noise, balance EQ, and sweeten dialogue. Learn basic audio repair: noise reduction, compression, and EQ shaping. A few hours of practice can turn rough location sound into professional‑grade audio.
If you have a little extra budget, plugins like
iZotope RX Elements are worth every penny. They can rescue takes you thought were unusable.
💡 The Indie Philosophy: Control What You Can
Recording good sound on a budget is about control — not perfection. Control your environment, your mic placement, your monitoring, and your post workflow. Every dollar you save can be offset by awareness and preparation. The audience doesn’t care what gear you used; they care that they can hear the story clearly.
So treat sound like a character. Give it space, attention, and respect. Because when your audio feels cinematic, your film instantly feels bigger — no matter how small your budget is.
Leave a comment